技術ブログ
技術ブログ
先日購入した DELL PowerEdge T320 に Oracle VM 3.2.2をインストールします。
自分は2010年4月から、OracleVM 2.1.x, Oracle VM 3.1.xと継続的にOracle VMを 使用し続けています。使用目的は 主に RAC構成のOracle Database の機能検証です。 この目的のために どのようなOracle VMの構成または使用形態がよいのかいろいろと試行錯誤しながら検討してきましたが、結局、以下の考え方に落ち着いています。
しかし、実装のレベルで 4. をどのように実現してゆくかが明確でありませんでした。
今回、Dom-0にOracle VM Managerを導入し、1つのOracle VM Managerで、複数のOracle VM Serverを管理せず、1つのOracle VM Serverだけを管理するようにして、Oracle VM Managerの影響範囲を限定することで、これを実現できないか試してみることにします。
Dom-0へOracle VM Managerをインストールすることは、サポートされる構成ではありません。しかし、Pythianのエンジニア Yury Velikanov さんが手順をblogにまとめてくれているので、これを参考にします。
Oracle VM Manager 3.2では、リポジトリに使用するRDBMSがデフォルトでMySQLに なっているので必要なリソースが大幅に減っている点がうれしいところです。
以下にインストーラ実行時のログを張っておきます。
[root@csov32s2 ~]# /mnt/cdrom/runInstaller.sh -n

Oracle VM Manager Release 3.2.2 Installer

Oracle VM Manager Installer log file:
/tmp/ovm-manager-3-install-2013-07-29-003941.log

Please select an installation type:
   1: Simple (includes database if necessary)
   2: Custom (using existing Oracle database)
   3: Uninstall
   4: Help

   Select Number (1-4): 1

Starting production with local database installation ...

Verifying installation prerequisites ...
*** WARNING: Recommended memory for the Oracle VM Manager server installation using Local MySql DB is 7680 MB RAM
hardnofiles should be set to 8192 but was 4096
Directory or mountpoint /u01 is required
Ignoring prerequisites check ...

One password is used for all users created and used during the installation.
Enter a password for all logins used during the installation:
Invalid password.
Passwords need to be between 8 and 16 characters in length.
Passwords must contain at least 1 lower case and 1 upper case letter.
Passwords must contain at least 1 numeric value.
Enter a password for all logins used during the installation:
Enter a password for all logins used during the installation (confirm):

Verifying configuration ...

Start installing the configured components:
   1: Continue
   2: Abort

   Select Number (1-2): 1

Step 1 of 9 : Database Software...
Installing Database Software...
Retrieving MySQL Database 5.5 ...
Unzipping MySQL RPM File ...
Installing MySQL 5.5 RPM package ...
Configuring MySQL Database 5.5 ...
Installing MySQL backup RPM package ...

Step 2 of 9 : Java ...
Installing Java ...

Step 3 of 9 : Database schema ...
Creating database 'ovs' ...
Creating user 'ovs' for database 'ovs'...

Step 4 of 9 : WebLogic ...
Retrieving Oracle WebLogic Server 11g ...
Installing Oracle WebLogic Server 11g ...

Step 5 of 9 : ADF ...
Retrieving Oracle Application Development Framework (ADF) ...
Unzipping Oracle ADF ...
Installing Oracle ADF ...
Installing Oracle ADF Patch...

Step 6 of 9 : Oracle VM  ...
Retrieving Oracle VM Manager Application ...
Extracting Oracle VM Manager Application ...
Installing Oracle VM Manager Core ...

Step 7 of 9 : Domain creation ...
Creating Oracle WebLogic Server domain ...
Starting Oracle WebLogic Server 11g ...
Configuring data source 'OVMDS' ...
Creating Oracle VM Manager user 'admin' ...

Step 8 of 9 : Deploy ...
Deploying Oracle VM Manager Core container ...
Deploying Oracle VM Manager UI Console ...
Deploying Oracle VM Manager Help ...
Granting ovm-admin role to user 'admin' ...
Set Log Rotation ...
Disabling HTTP and enabling HTTPS...
Configuring Https Identity and Trust...
Configuring Weblogic parameters...

Step 9 of 9 : Oracle VM Manager Shell ...
Retrieving Oracle VM Manager Shell & API ...
Extracting Oracle VM Manager Shell & API ...
Installing Oracle VM Manager Shell & API ...

Retrieving Oracle VM Manager Upgrade tool ...
Extracting Oracle VM Manager Upgrade tool ...
Installing Oracle VM Manager Upgrade tool ...

Retrieving Oracle VM Manager CLI tool ...
Extracting Oracle VM Manager CLI tool...
Installing Oracle VM Manager CLI tool ...
Copying Oracle VM Manager shell to '/usr/bin/ovm_shell.sh' ...
Installing ovm_admin.sh in '/u01/app/oracle/ovm-manager-3/bin' ...
Installing ovm_upgrade.sh in '/u01/app/oracle/ovm-manager-3/bin' ...
Enabling Oracle VM Manager service ...
Shutting down Oracle VM Manager instance ...
Restarting Oracle VM Manager instance ...
Waiting for the application to initialize ...
Oracle VM Manager is running ...
Oracle VM Manager installed.

Please wait while WebLogic configures the applications... This can take up to 5 minutes.

Installation Summary
--------------------
Database configuration:
  Database type               : MySQL
  Database host name          : localhost
  Database name               : ovs
  Database listener port      : 49500
  Database user               : ovs

Weblogic Server configuration:
  Administration username     : weblogic

Oracle VM Manager configuration:
  Username                    : admin
  Core management port        : 54321
  UUID                        : 0004fb0000010000007821f67dc2a5f6

Passwords:
There are no default passwords for any users. The passwords to use for Oracle VM Manager, Database, and Oracle WebLogic Server have been set by you during this installation. In the case of a default install, all passwords are the same.

Oracle VM Manager UI:
  https://csov32s2.cstest:7002/ovm/console
Log in with the user 'admin', and the password you set during the installation.

Please note that you need to install tightvnc-java on this computer to access a virtual machine's console.

For more information about Oracle Virtualization, please visit:
  http://www.oracle.com/virtualization/

Oracle VM Manager installation complete.

Please remove configuration file /tmp/ovm_configI_D7Sp.
[root@csov32s2 ~]#
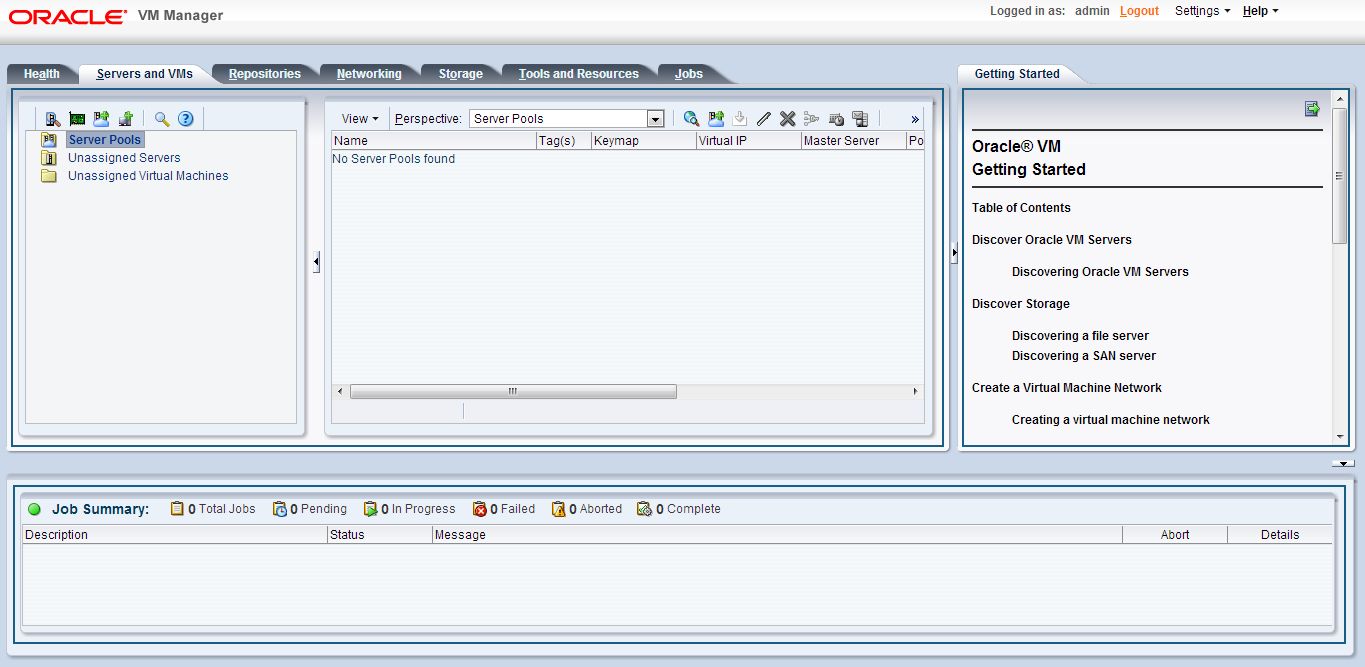
画面の印象はOracle VM Manager 3.1.xと大きく変わりませんね。Health タブが追加されているなど、細かいところでは変わっていますが・・・


プロフィール
渡部 亮太
・Oracle ACE
・AWS Certified Solutions Architect - Associate
・ORACLE MASTER Platinum Oracle Database 11g, 12c 他多数
カテゴリー
アーカイブ
2025年
2024年
2023年
2022年
2021年
2020年
2019年
2018年
2017年
2016年
2015年
2014年
2013年
2012年
2000年